The Deployment Request deep dive
REFERENCE DECK — LINKED FROM THE MAIN WORKSHOP, NOT PART OF THE CORE DAY
From source control to Deployment Request
Source control
App Repo
Update Set
Deployment Request
Two core flows, one pipeline
Assessment flow
Instance Scan → Move to Test → Run ATF → Ready for Deploy.
Release flow
Pushes every ready Deployment Request to production, together.
Freeze date vs. release date
Freeze date
Cutoff for reaching Ready for Deployment.
Release date
When the push to production fires.
Why dev → test only doesn't work
Dev
Test / Staging / UAT
Final destination
ReleaseOps needs all three — a two-instance setup has nowhere left to release to.
The assessment playbook, stage by stage
Instance Scan
Static policy check, on the dev instance
Move to test
Assessment begins
Run ATF
Functional coverage
Ready for Deploy
Cleared for release
Studio to production, step by step
- 1️⃣Build and install the app from the IDE
- 2️⃣Publish the app to the App Repository
- 3️⃣Find the Update Set that publish just created
- 4️⃣Create a Release record on the destination instance
- 5️⃣Promote the Update Set → create a Deployment Request
- 6️⃣Activate the Release
- 7️⃣Mark the Deployment Request "Ready to Assess" → watch the playbook run
- 8️⃣Set up a manual pause point with a Deployment Request Task
Build & install the app from the IDE
- 🛠️Build the app in your IDE.
- 📥
now-sdk build, thennow-sdk install. - 🔎Now it's visible in Studio.
Publish the app to the App Repository
- 1️⃣Open the app in Studio.
- 2️⃣App Details → Publish.
- 3️⃣Now visible company-wide.
Find the Update Set publish created
- 1️⃣Search Local Update Sets on dev.
- 2️⃣Publish created one automatically.
- 3️⃣That's the Deployment Request payload.
Create the Release record — the basics
- 1️⃣On the destination instance: new Release record.
- 2️⃣Set the destination environment.
Create the Release record — pipeline & timing
- 1️⃣Pick a pipeline: Scheduled or On Demand.
- 2️⃣Set freeze date and release date.
- 3️⃣Save.
Promote the Update Set → create a Deployment Request
- 1️⃣On dev: Promote Update Set.
- 2️⃣Check "Create new deployment request."
- 3️⃣Link the Release you made.
Activate the Release
- 1️⃣Release record → Activate Release.
- 2️⃣State: Active.
Ready to Assess → watch it move
- 1️⃣Click Ready to Assess.
- 2️⃣State → Assessing, automatically.
- 3️⃣Watch the activity log narrate it live.
Inside Workflow Studio: find the playbook
- 1️⃣Open Workflow Studio.
- 2️⃣Filter Playbooks by ReleaseOps.
- 3️⃣Four stages, left to right — next up.
Instance Scan
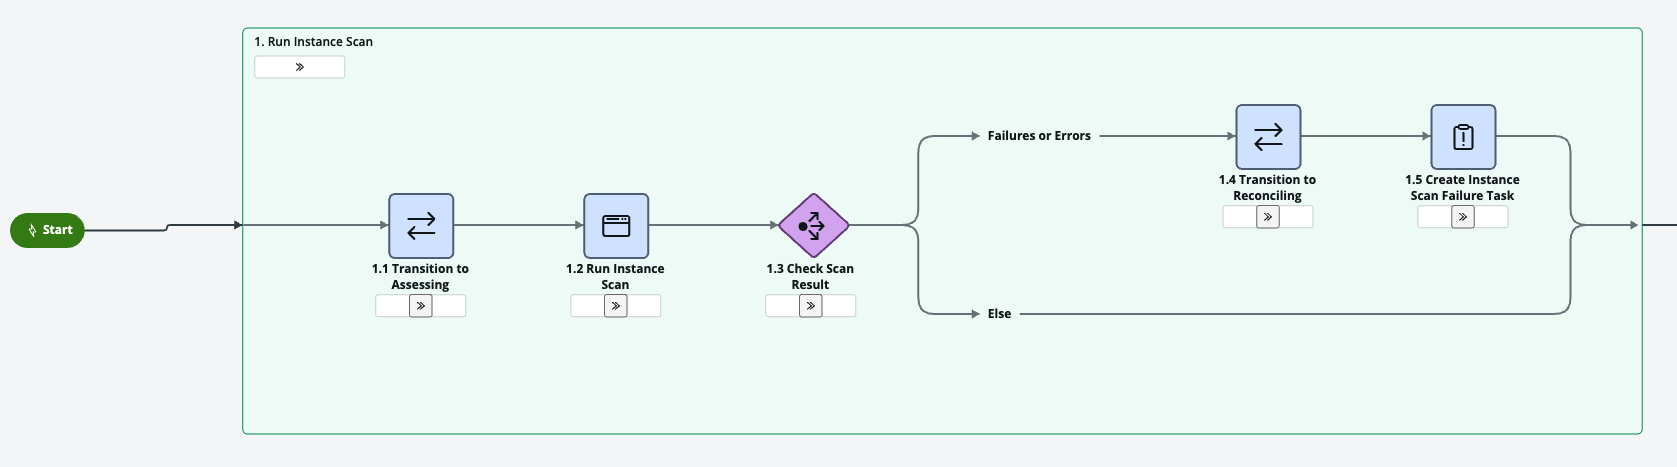
A static policy check on dev. Failures branch to a Reconciling task.
Move to Test
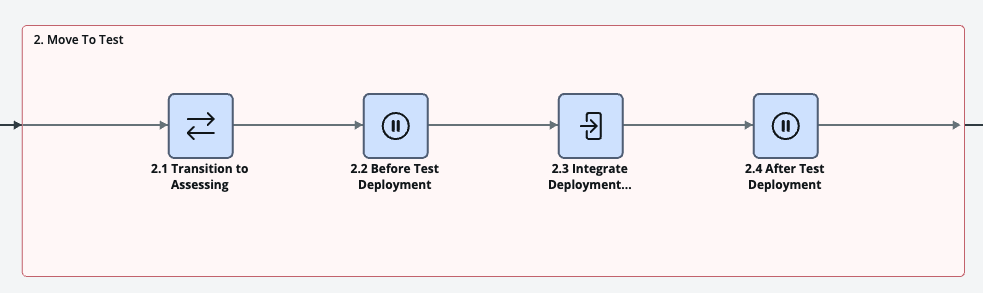
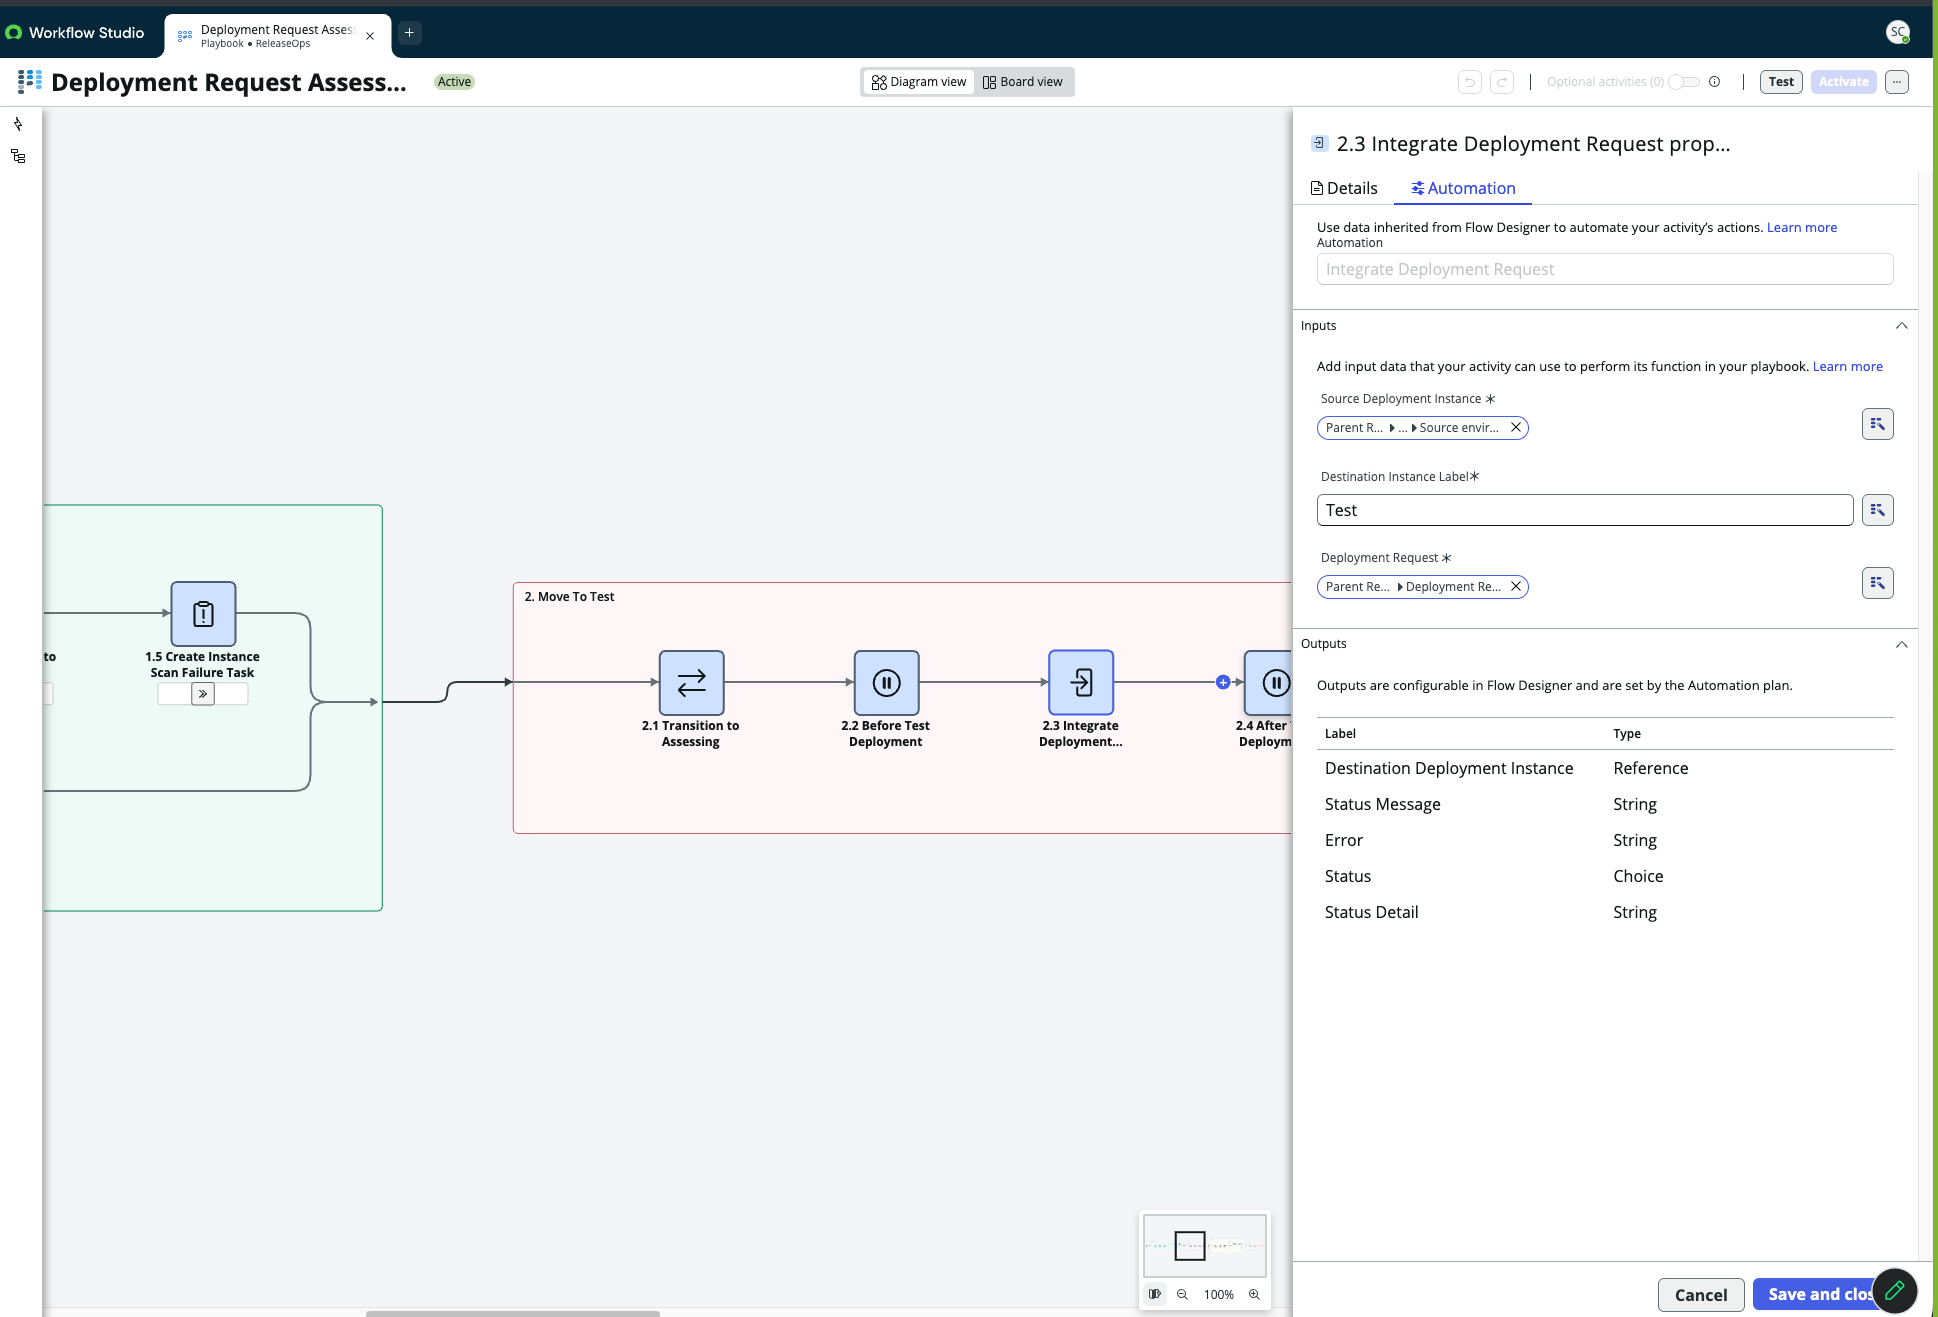
"Test" is a label, not a hard-coded instance — the destination is configurable.
Run ATF Tests
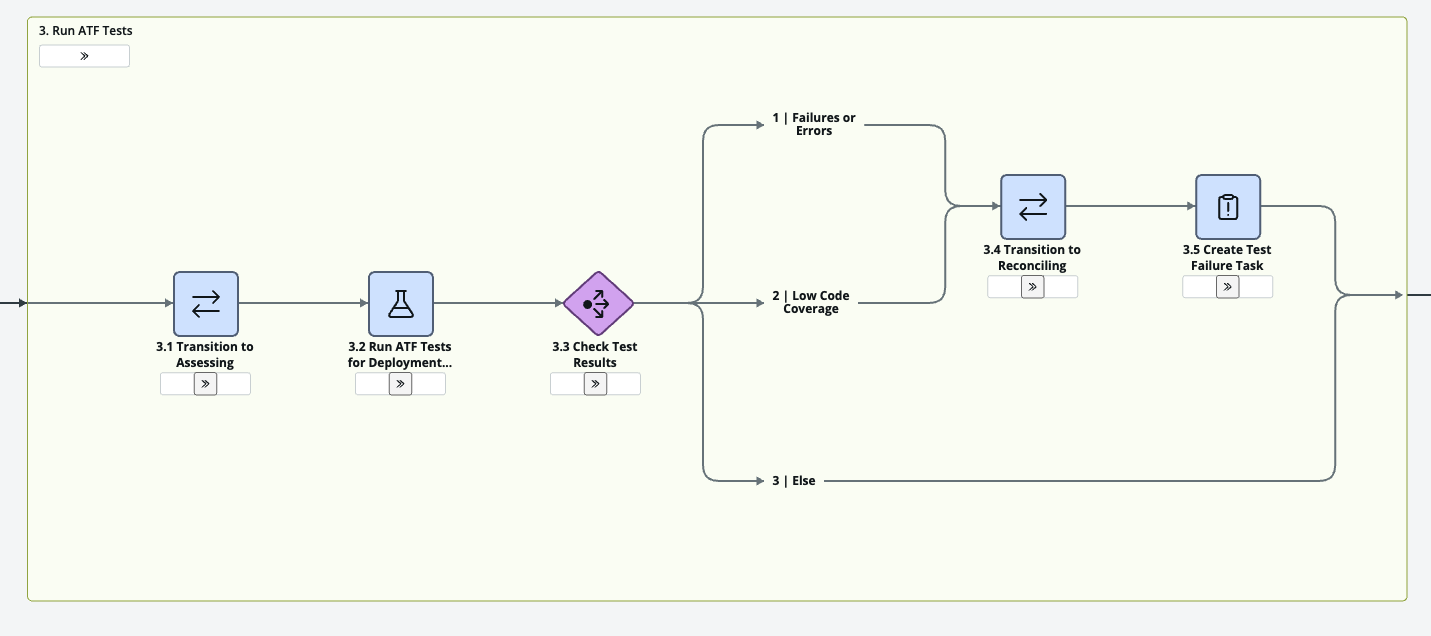
Two sad paths: failures, and low code coverage.
Ready for Deploy
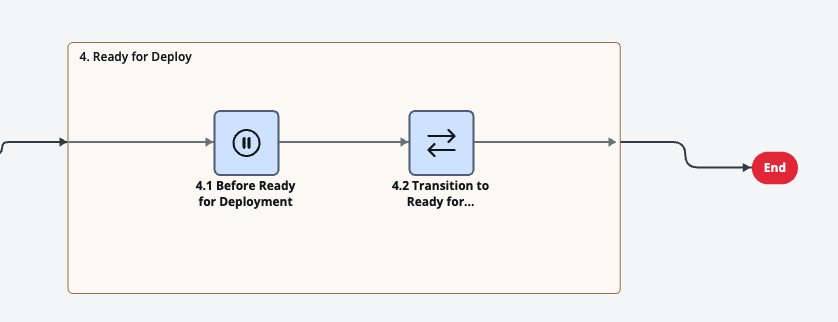
The finish line for assessment — not a push to prod.
Setting up a manual pause point
- 1️⃣Deployment Request Tasks — empty by default.
- 2️⃣Add a new task.
Pausing it, and resolving it
- 1️⃣The task is wired to a specific playbook stage.
- 2️⃣Resolve it → the playbook picks back up.
What ReleaseOps can't do yet
ATF suite selection from prod
Net-new app suites don't exist on prod yet.
Fixed scripts & data loads
~80% of customers ask for this interleaving.
IDE vs. Studio publish
Open question — can App Repo publish happen from the IDE?
Deployed to prod
Built, assessed, and released — with sign-off exactly where the team wanted it.
- 🧱Same payload, now playbook-driven.
- ⏸️Sign-off is a tracked task, not a Slack thread.
- 🚀Release fires on schedule, unattended.
Back to the workshop
That's the full pipeline — architecture, the assessment playbook, and the pause-point mechanics. Head back to the main deck, or into the hands-on exercise.